A flow is a small diagram: one trigger box that starts things off, connected to one or more step boxes that run in order or in parallel branches. When the trigger fires, on a schedule, on demand, or when something happens in a connected system, the flow runs through the connected steps automatically. Reach for a flow instead of a one-off chat or a manual swarm run whenever you want something to happen repeatedly and unattended.
Every flow has exactly one trigger. If a flow has no trigger, or somehow ends up with more than one, Save refuses and tells you a trigger problem needs fixing before you can save.
The Flows list
Open the Flows tab from the top navigation, next to Chat, Build, and Data. You will see a table of every flow in your org, plus a banner near the top showing how many flow seats your org has used, for example "2 of 10 flow licenses in use". Click New Flow to start one from scratch, a brand-new flow starts with just a single Manual trigger box, ready to build from.
| Column | What it shows |
|---|---|
NAME | The flow’s name and how many steps it has. |
STATUS | Idle, Running, Failed, or Disabled. |
ACTIVE | A toggle to enable/disable the flow without deleting it. |
TRIGGER | How it starts (Schedule, Event, or Manual), plus its schedule string if scheduled. |
LAST RUN / DURATION / RUNS · SUCCESS | Recent run history at a glance. |
OWNER | Who created it. |
Canvas basics
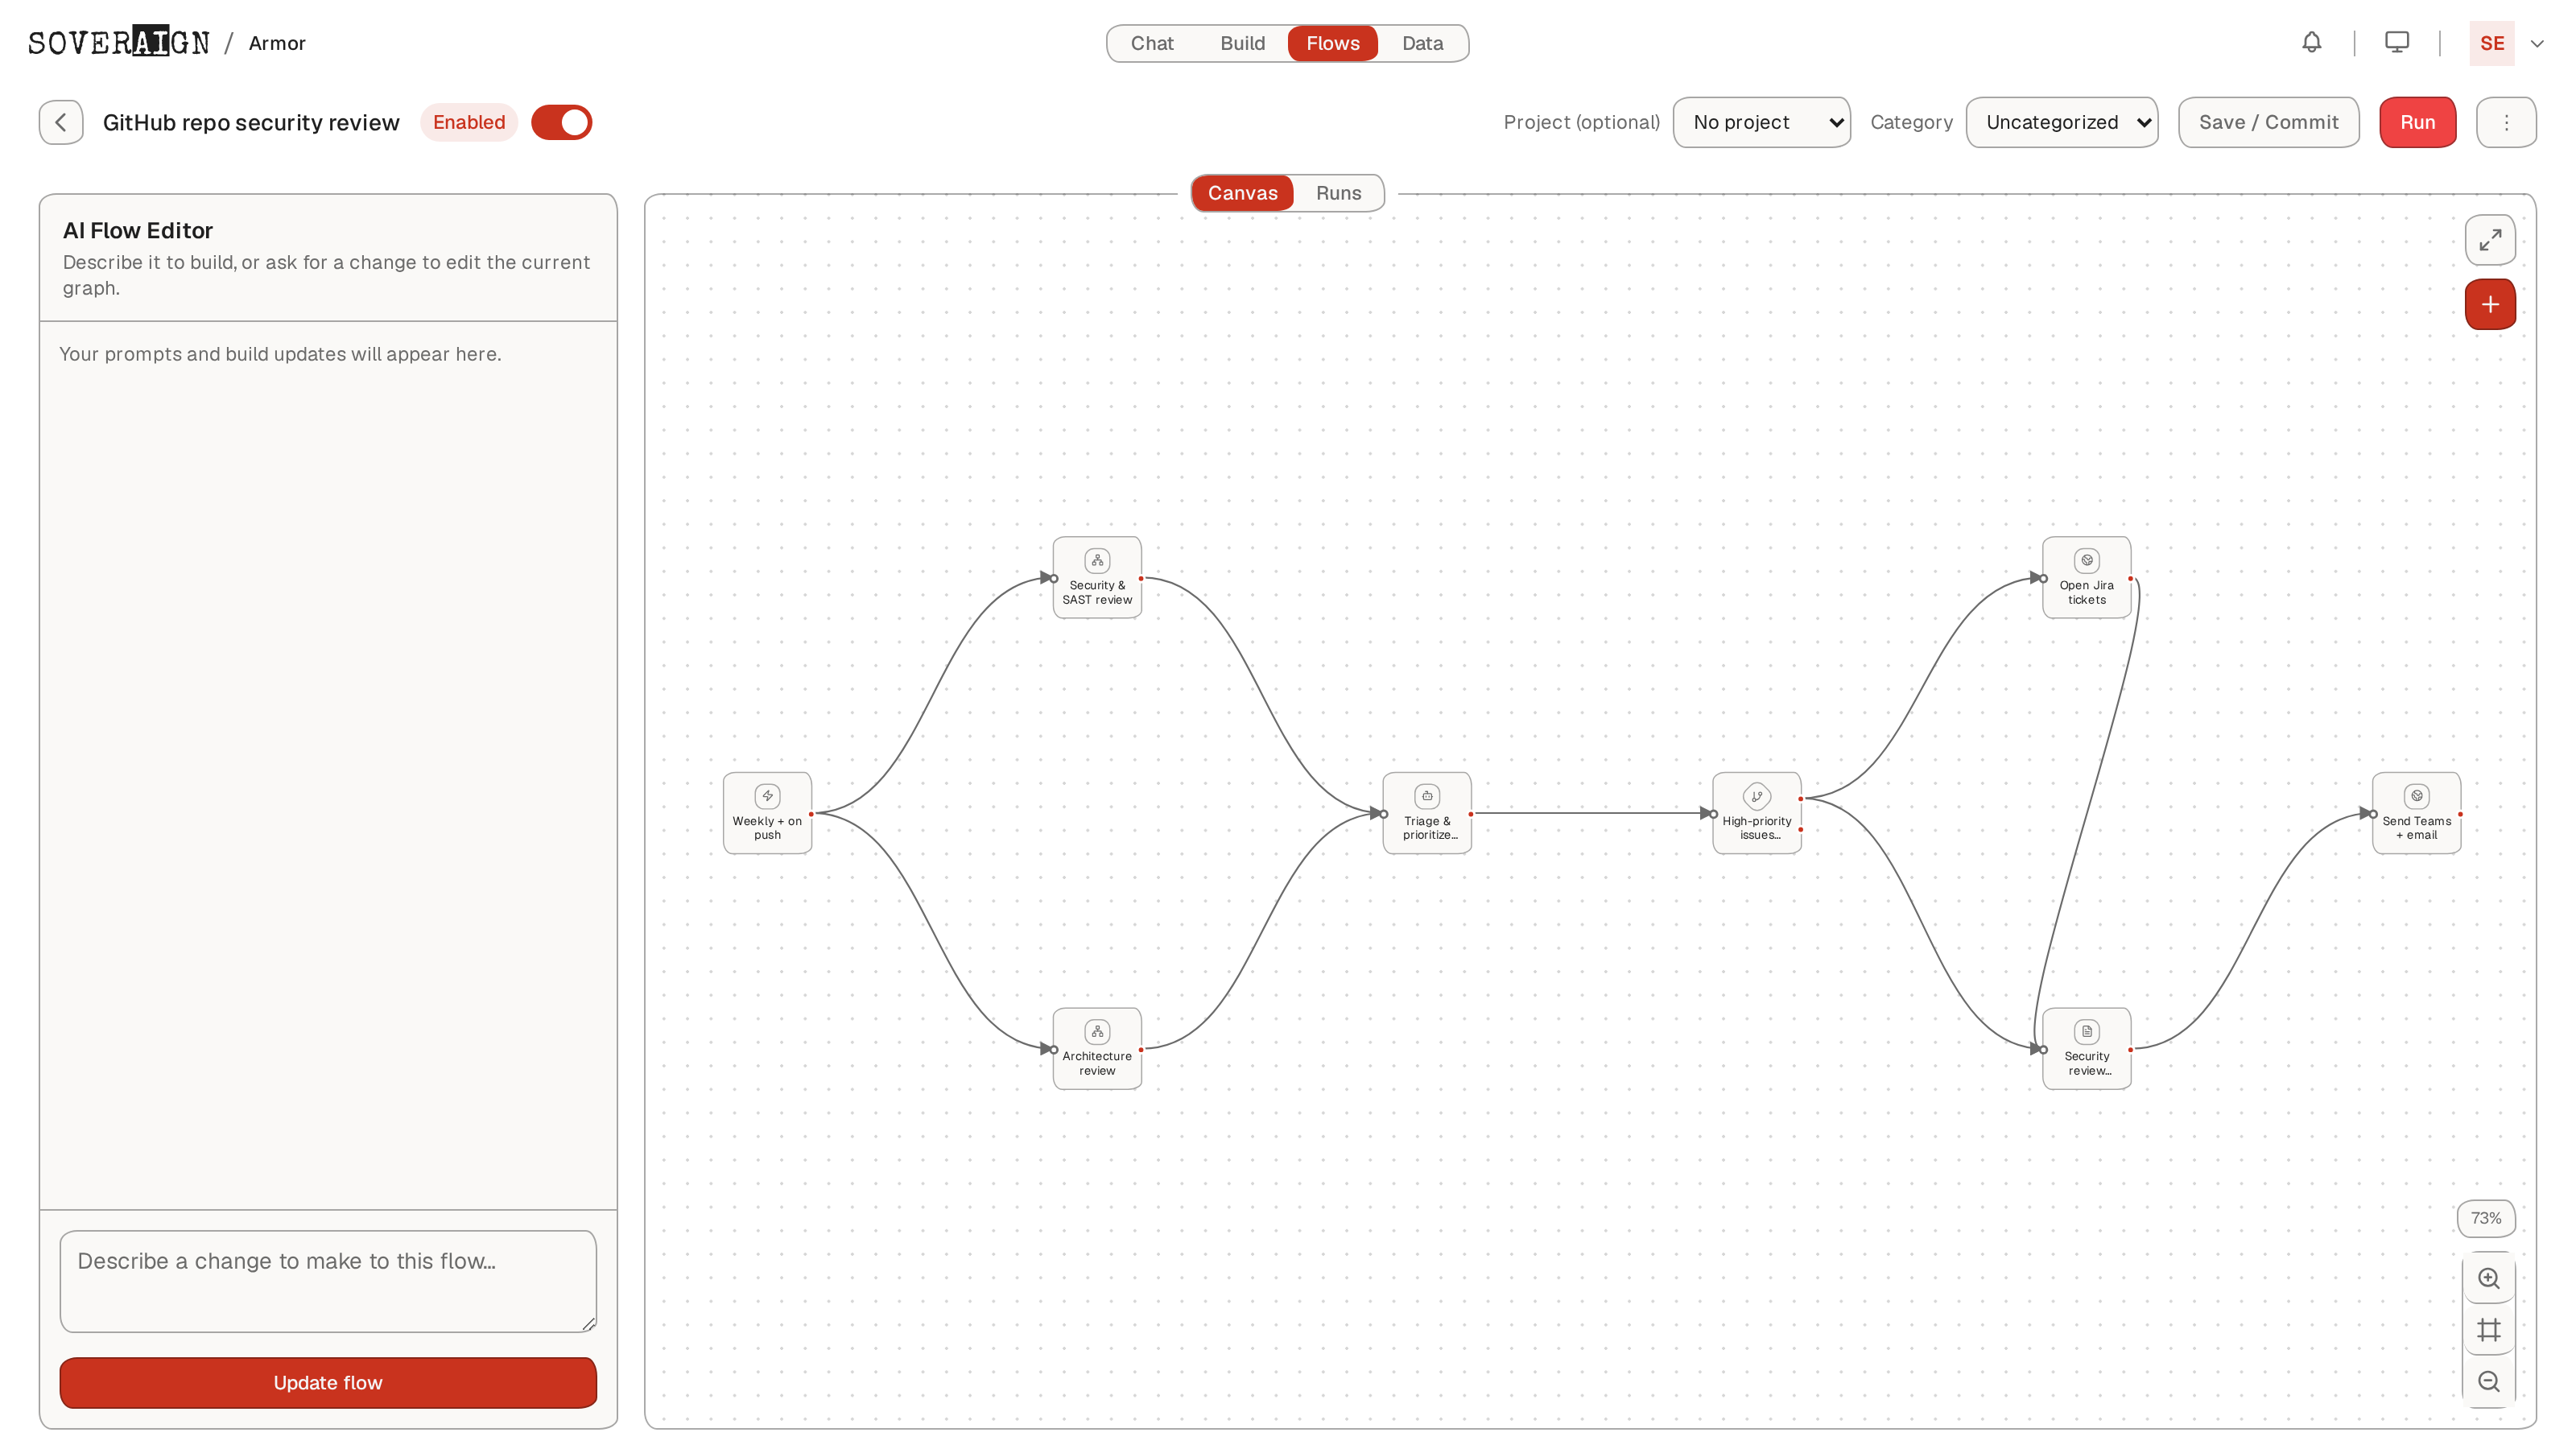
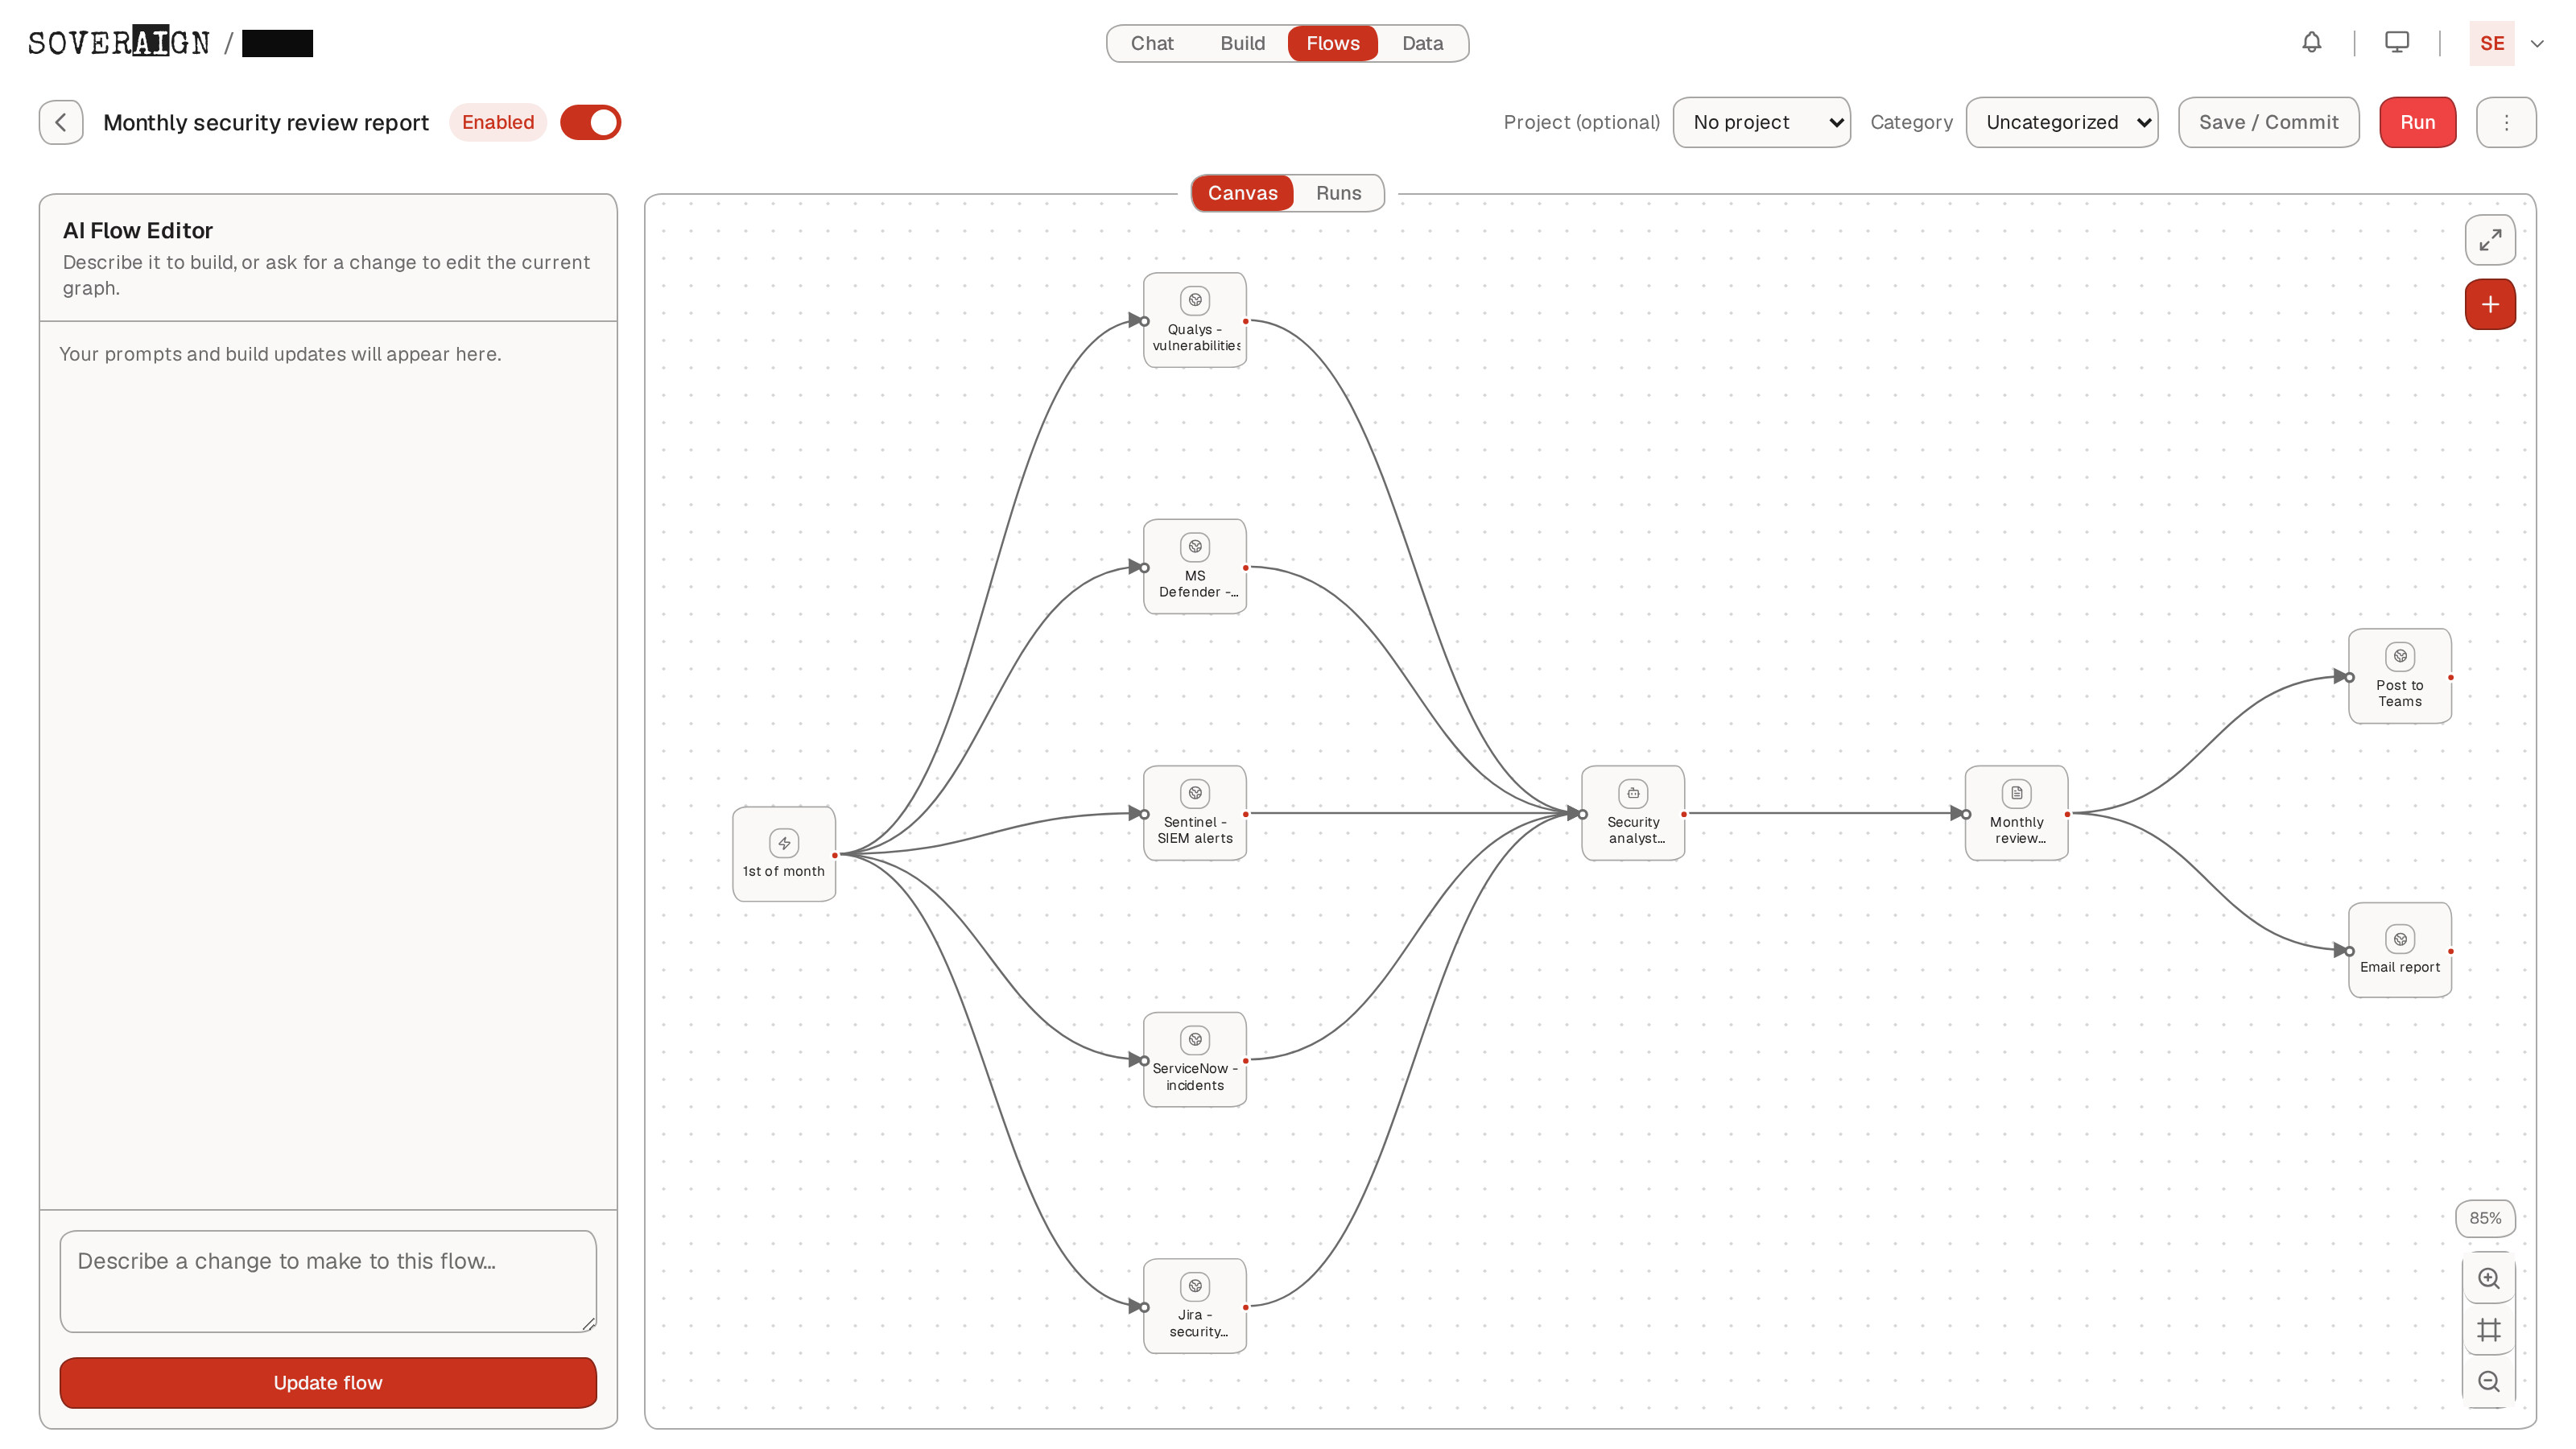
Opening a flow lands you on the Canvas tab (there is also a Runs tab, covered below). Along the top: the flow’s name, an Enabled toggle, a Project (optional) dropdown, and a Category dropdown. Save / Commit stays greyed out until you make a change, once you edit anything it lights up and an "Unsaved changes" label appears next to a Discard button so you can back out. Run runs the flow right now, and a ⋮ (More actions) menu holds the less-common actions.
The canvas itself is a pannable, zoomable grid. In the bottom-right corner: zoom in/out, Balance & fit the layout (auto-arranges the boxes so everything is visible), and a fullscreen toggle.
- 1Click Add nodes (top-right of the canvas) to open the side panel listing every step type. Click one, or drag it onto the canvas, and it appears as a new box already filled in with sensible defaults.
- 2Drag from the small connector dot on the right edge of one box to another box to draw a line between them, that is the order things run in. Draw more than one line out of a box to create parallel branches.
- 3Every connecting line has a small + button floating on it. Click it to insert a brand-new step right there, the line splits automatically so the new step sits between the two boxes it used to connect directly.
- 4Drag a box to reposition it, click a box (without dragging) to select it and open its configuration panel, and hover over a box or a connecting line to reveal an X that deletes it.
Every step type
Click Add nodes to see the full palette. Clicking any box afterward opens a configuration panel where you fill in that step’s settings. Every field below is named exactly as it appears in that panel.
| Node | What it does | Key fields |
|---|---|---|
| Trigger | The one required starting point of every flow. You cannot delete or duplicate it. | Trigger type: Manual (runs on click or via API), Schedule (Cron expression, Timezone, optional Spend cap USD), or Event (currently GitHub: new PR, CI failure, vulnerability finding, or push - pick repository and event type). |
| Crew | A saved multi-agent crew, dropped into the flow as a single step. | Role (required), Model (optional), Swarm config (attaches a previously saved crew configuration). |
| Agent | A single, self-contained AI step: write an instruction, pick a role, it runs once and produces an output. | Instruction (required), Role (required), Model (optional), Max iterations (capped at 100), Timeout in seconds (capped at 10 minutes), Output (text or structured JSON), Output schema (named fields when Output is JSON). |
| Task | A plain note/placeholder box. Does not run anything, just annotates a manual step outside the flow. | Name, Description. |
| Swarm | Dispatches a full multi-agent swarm, several agents collaborating, versus the single call an Agent step makes. | Task description, roles/how many of each, loop limit, acceptance criteria, whether it needs a human gate-approval before proceeding. |
| Human | Pauses the flow and waits for a person to approve before continuing. | Approval prompt, who is assigned to approve, optional time limits (approval freshness, step timeout). |
| Report | Produces a formatted summary/report from the flow’s results so far. | Report title, what content it should include. |
| Decision | A branch point that routes the flow down one of two paths depending on a condition. | Decision prompt (can reference earlier steps’ outputs), True branch target, False branch target. |
| Loop | Repeats a set of steps multiple times, for example once per item in a list. | Loop mode, Requested iterations, Max iterations (safety cap). |
| Set Variable | Stores a value under a name so later steps can reference it. | State key, Value type. |
| Echo | The simplest step, just outputs a fixed message. Handy for testing a flow’s wiring before filling in the real steps. | Message. |
| HTTP Request | Calls an external API or webhook. The step to reach for whenever you need to talk to a system with no dedicated node (Jira, Teams, email). | Name, Method (GET/POST/PUT/PATCH/DELETE), URL (accepts {{...}} references), Body, Timeout (ms). |
| GitHub | Performs an action against a GitHub repository. | Action (create a branch, commit files, open a PR, or leave a comment), Repository, action-specific fields (target branch, PR number, comment body). |
Passing information between steps
Most text fields, an Agent’s Instruction, an HTTP Request’s URL or Body, a Decision’s prompt, and so on, accept {{ }} references to pull in a result from an earlier step. Type the step’s name and the piece of its output you want, wrapped in double curly braces.
Reference syntax
{{ StepName.field }}For example, if you have an HTTP Request step named "Call API" earlier in the flow, a later Agent step’s Instruction could read:
Summarize the response from {{Call API.body}} in two sentences.When the flow runs, {{Call API.body}} is replaced with whatever that step actually returned. You only need to reference a step this way if you want to use its result, steps that do not need any prior output can just be filled in with plain text. An Agent or Crew step can also be told to publish part of its result under a name other steps can reference later, this is how you carry a summary or a decision forward through a longer flow.
Attaching a flow to a Project
The Project (optional) dropdown at the top of the editor associates this flow with one of your org’s projects, which matters for steps like Swarm that need repository/context access scoped to a specific project. If you see a "Projects could not be loaded" warning, your current project binding is still preserved, just retry the dropdown before changing it.
No dedicated Jira / Teams / Email step exists. If you want a flow to open a Jira ticket, post to Teams, or send an email, use an HTTP Request step pointed at that system’s API or incoming webhook. Flows also automatically raises an in-app notification whenever a run completes or fails, on top of anything your steps do.
Common validation errors
Flows validates your graph before saving, and blocks Save with a clear message instead of silently accepting something broken.
- →Leaving a required field blank (no Role on an Agent/Crew step, no Instruction on an Agent step): Save is blocked and the message names which step and field need attention.
- →A flow with no trigger, or more than one trigger: Save is blocked, every flow needs exactly one.
- →A step referencing another step that no longer exists (you deleted a step something else still points to): Save is blocked, so you do not end up with a broken flow. This only applies to flows you build by hand — if the AI Flow Editor generates a graph with a stray dangling reference, it quietly cleans that up rather than blocking the save.
- →Numbers out of range (too many loop iterations, a timeout that is too long, too many output-schema fields): each has a sensible cap, and Save tells you which value needs adjusting.
Instead of building a flow by hand, you can describe what you want in plain English in the AI Flow Editor panel on the left of the canvas ("Describe it to build, or ask for a change to edit the current graph") and click Update flow, it generates or modifies the node graph for you. Review what it built, it may lay branches out in a single row rather than a true fan-out, use Balance & fit or drag nodes to tidy it up, before saving.
Running a flow and checking results
Click Run at the top of the editor to run the flow immediately, this works even for Schedule/Event-triggered flows, for testing. Switch to the Runs tab to see the history of every run: each shows its overall status (succeeded, running, failed) and how long it took. Expand a run to see a step-by-step trace, each step listed with its name, its type, and how long it took, in the order it actually executed. A failed or skipped step is called out so you know exactly where things went wrong.
Worked example: a scheduled review-and-approve flow
Here is a simple flow built entirely from the palette above: every morning, call an API, have an agent review it, and pause for approval if something looks off.
- 1Click New Flow. It starts with a single Manual Trigger box.
- 2Click the Trigger box, change its Trigger type to Schedule, set a Cron expression (e.g.
0 9 * * *for 9am daily) and a Timezone. - 3Click Add nodes, choose HTTP Request, and drag it onto the canvas. Connect the Trigger to it. Configure its Method (GET), URL (the API you want to check), and give it a clear Name like
Call APIso you can reference it later. - 4Add an Agent step after it. Connect
Call APIto it. In its Instruction, write something likeReview the response at {{Call API.body}} and summarize any issues.Set its Role, leave Output as text (or switch to JSON for a structured field back). - 5Add a Decision step after the Agent. Set its Decision prompt to something like
{{Review.isHealthy}} is false, and wire its True branch to a Human step (with an Approval prompt like "Response looked unhealthy, please confirm before we proceed") and its False branch straight to a Report step summarizing the all-clear. - 6Click Save / Commit. If anything is missing (a blank Role, no schedule set) you will see exactly which step to fix.
- 7Click Run to test it immediately, then check the Runs tab for the step-by-step trace of what happened.
Advanced: raw flow definition format
Everything above is enough to build and run a flow through the UI. If you are scripting against the API directly, a flow is stored as a small JSON document: a list of nodes (each with a flat x/y position, an id, a type from the palette above, e.g. trigger, agent, single_agent, task, swarm, human, report, decision, loop, set, echo, http_request, github, and a data object holding whatever that step’s config-panel fields map to) and a list of edges (id, source, target) connecting them.
Minimal manual-trigger flow
{
  "valuesMode": "strict",
  "nodes": [
    { "id": "trigger", "type": "trigger", "x": 40, "y": 40, "data": { "mode": "Manual" } },
    { "id": "reviewer", "type": "single_agent", "x": 340, "y": 40, "data": {
        "instruction": "Say hello.",
        "role": "architect"
      }
    }
  ],
  "edges": [
    { "id": "e1", "source": "trigger", "target": "reviewer" }
  ]
}
This is the same shape the editor reads and writes under the hood, you do not need it for everyday use, but it is useful if you are building or migrating flows programmatically.