Inviting people
The roster is where role and seat changes actually take effect, so an offboarding or a reorg is one table, not a hunt through invites and settings pages.
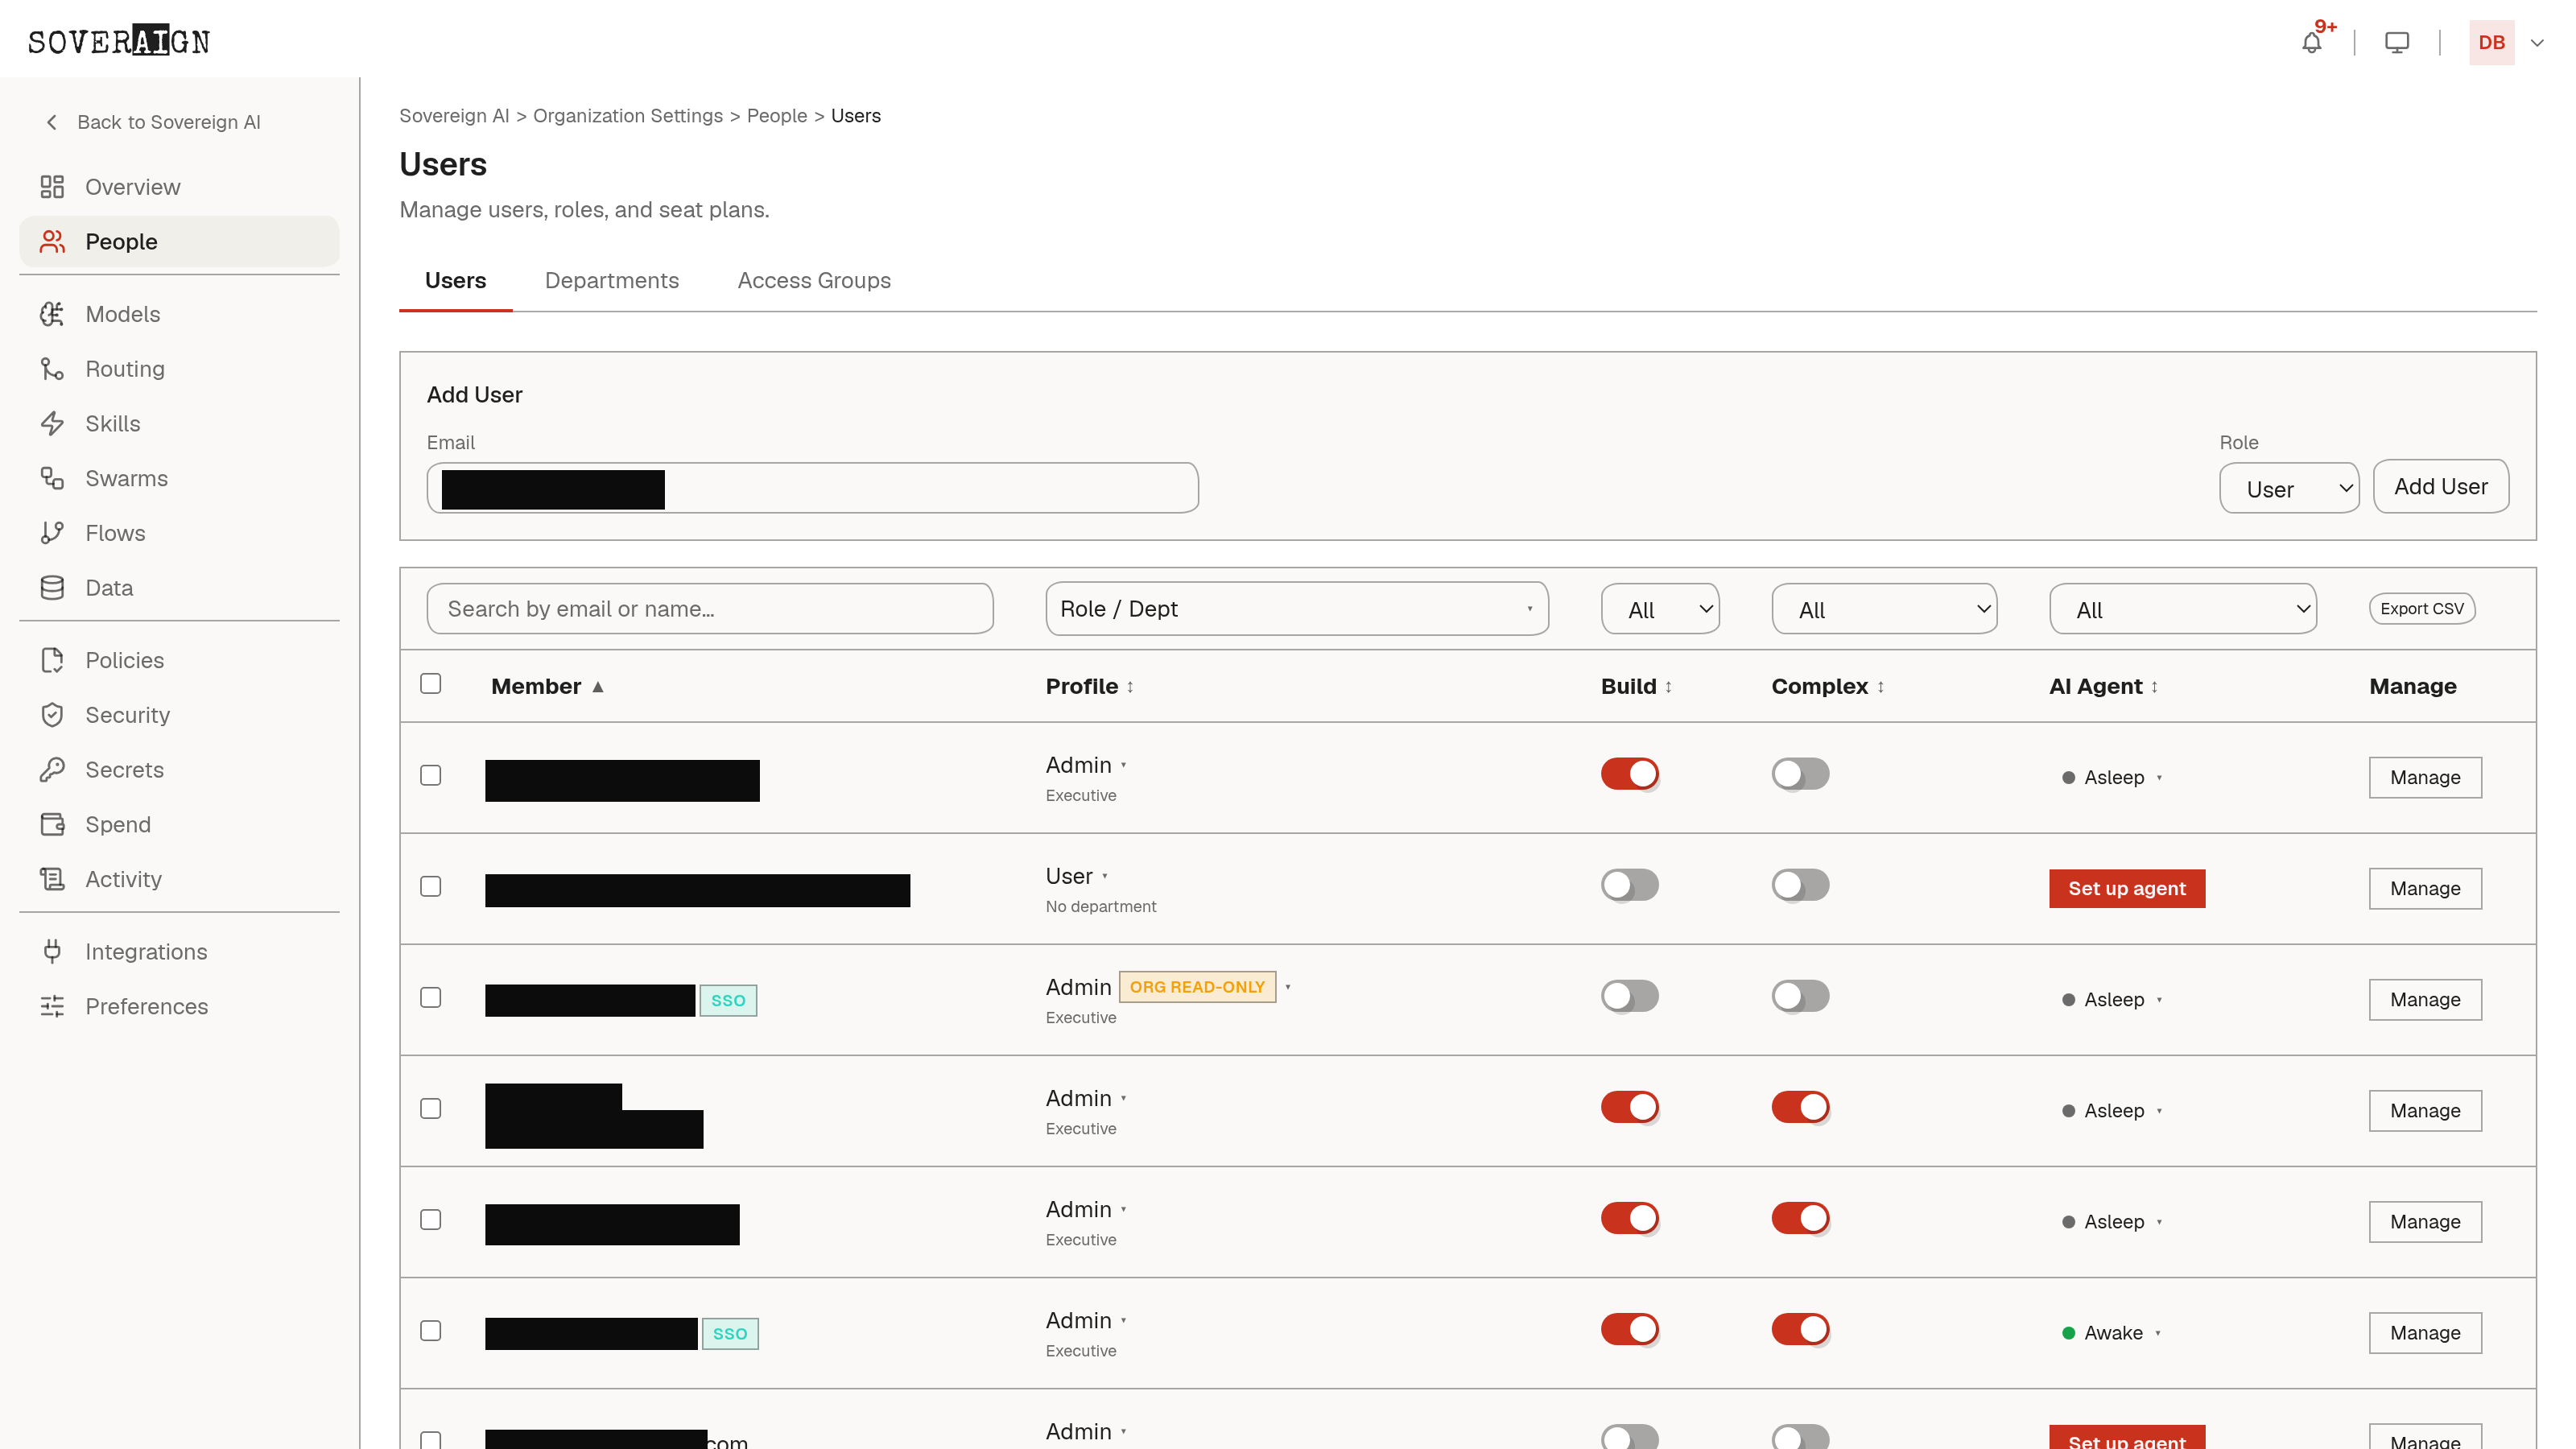
- 1Click Invite, enter the email address, and pick a role: user, org admin, or platform admin.
- 2The invitee gets an email. Pending invitations are listed until accepted.
Roles and seats
Members hold one role: owner, platform admin, org admin, user, or viewer. Separately, each member has a seat plan, Chat or Build, which is what determines their capabilities and billing. The user list shows each member's instance and its live status alongside role and seat.
Change one member's seat from their row, or select multiple members with the checkboxes and set the seat plan in bulk: a 500-seat org should not need 500 dropdown clicks. Bulk changes skip members already on the target plan and report how many were updated versus failed.
Complex model access, including time-boxed grants
Each user row also carries a Complex toggle, separate from Build access: it controls whether that person can reach the platform’s higher-tier (Complex) models rather than the Balanced floor every seat gets. Turning it on opens a small grant dialog rather than flipping instantly: Always, which stays on until an admin turns it off, or a fixed time period that expires automatically - 4 hours, 24 hours, 7 days, or 30 days.
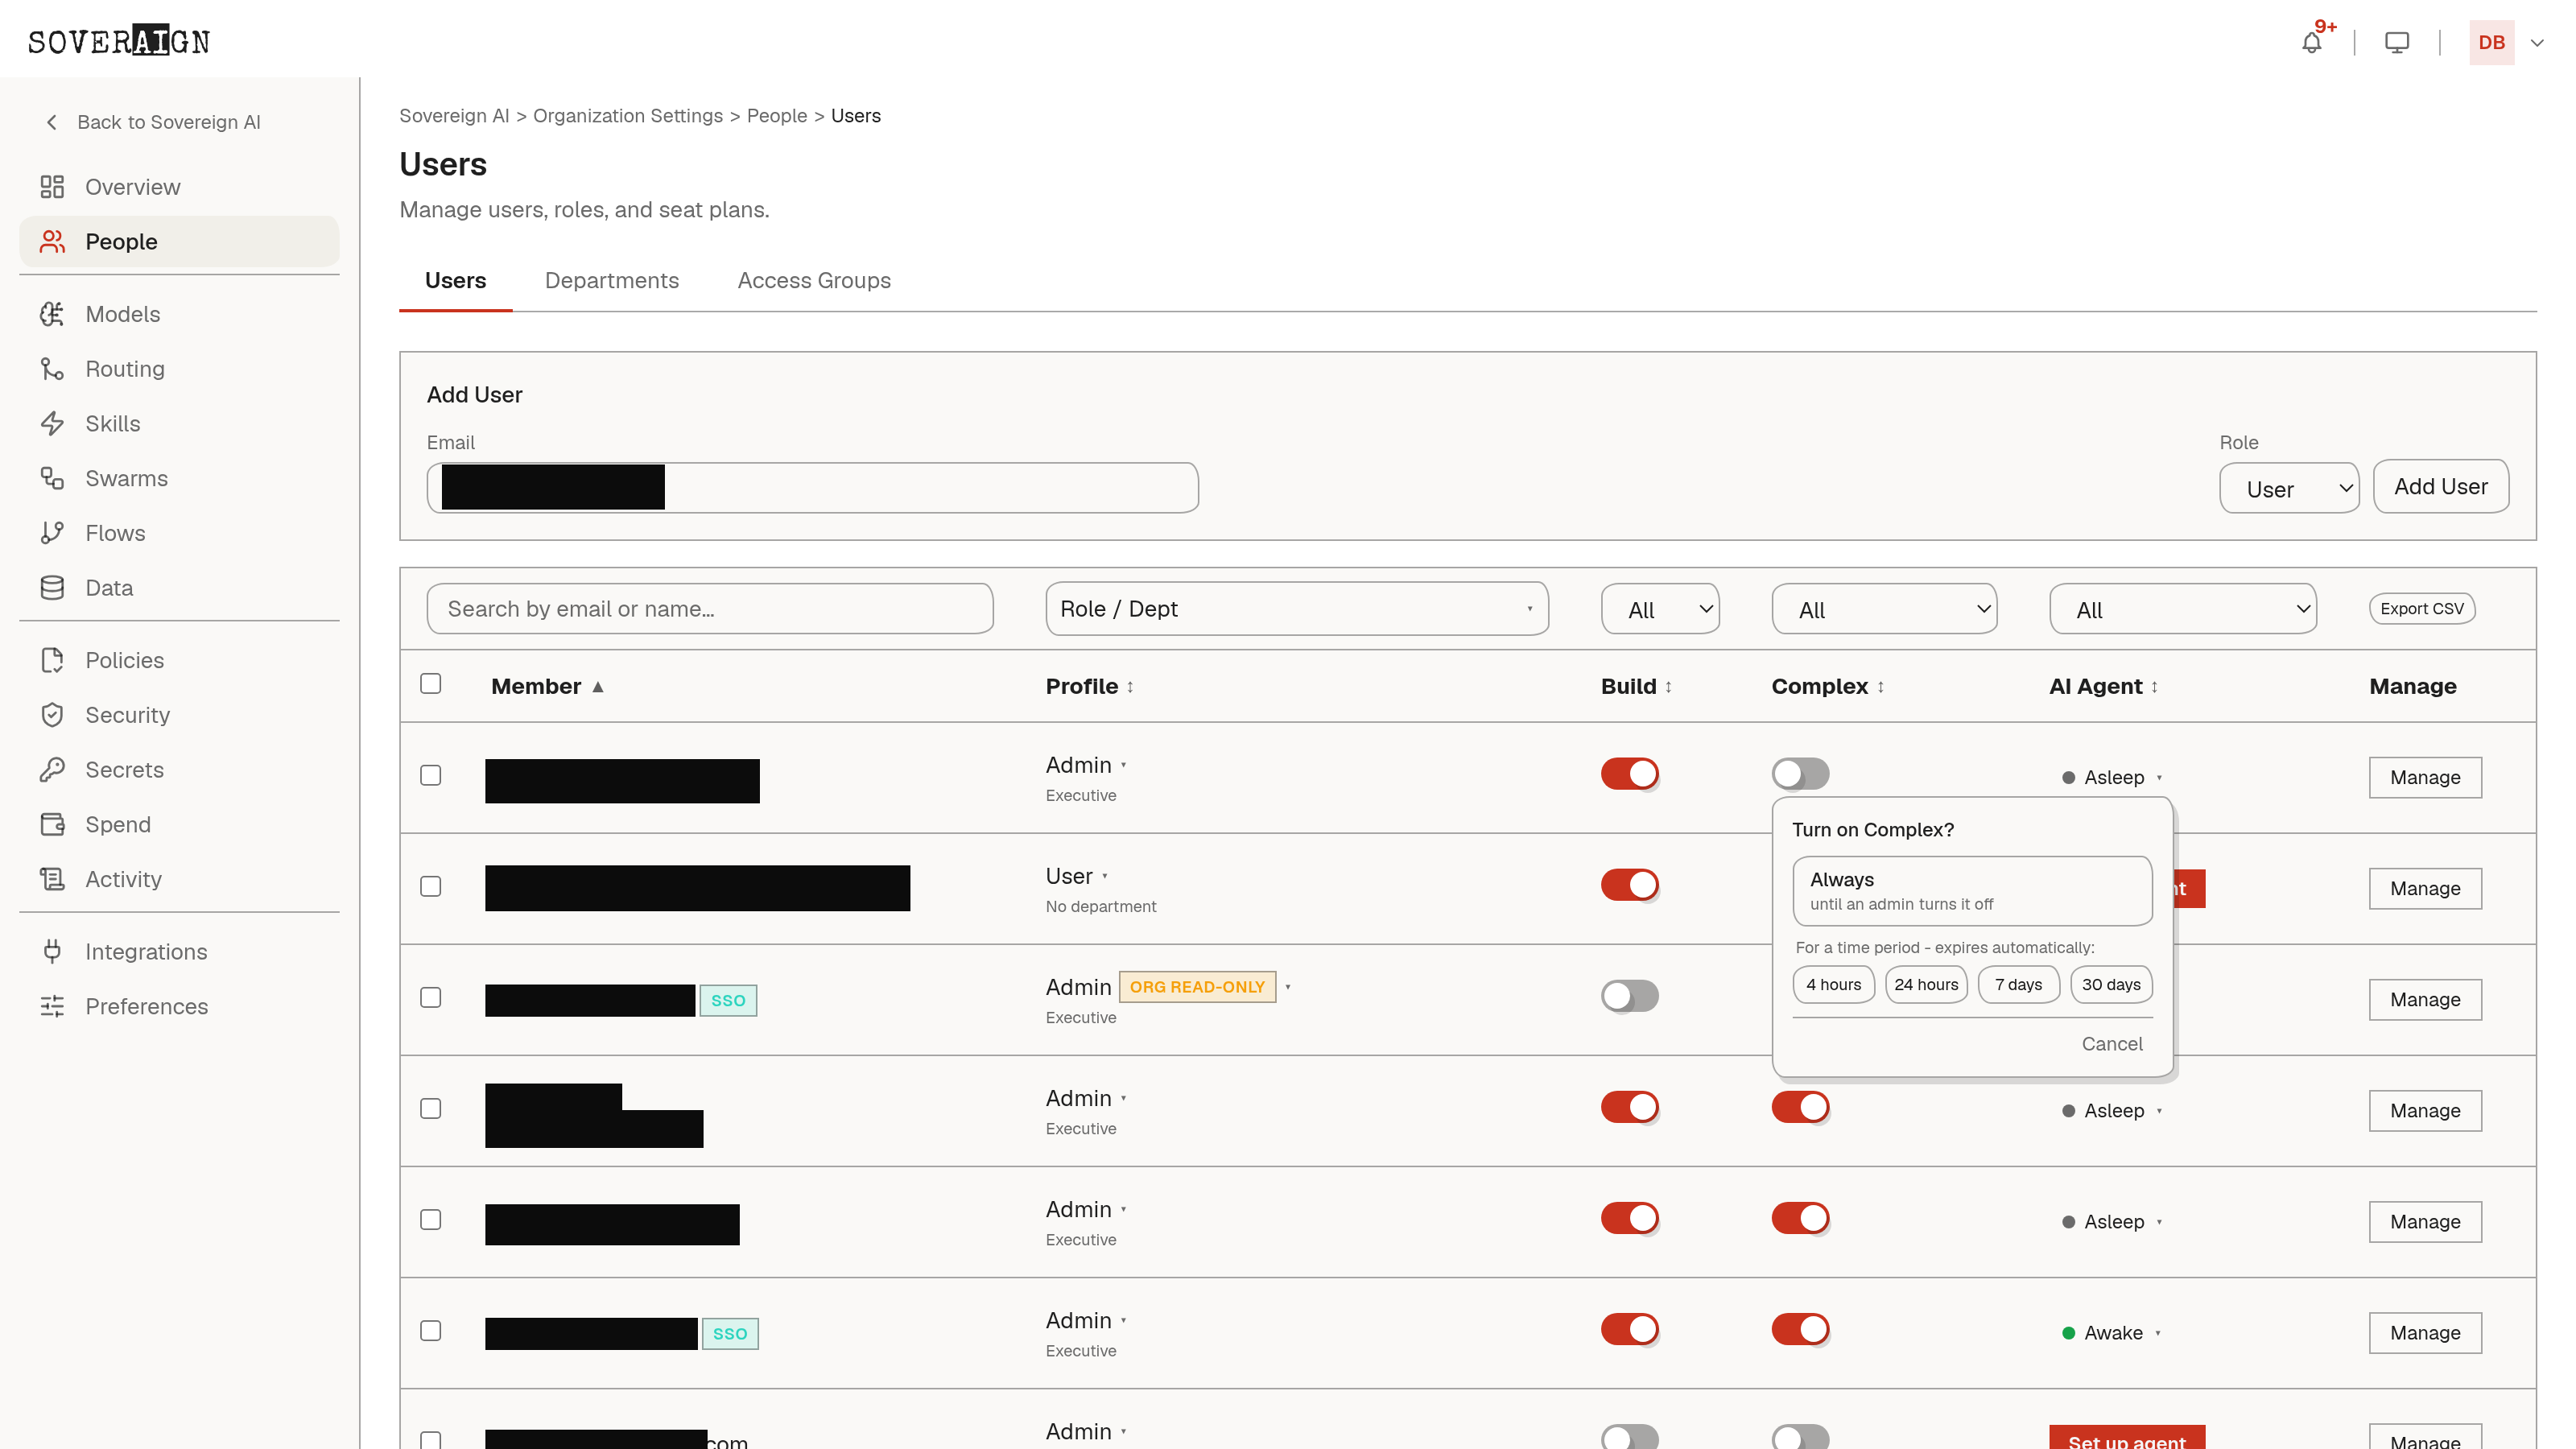
A timed grant shows a live countdown chip on the row - hours or minutes left, turning red under an hour - with an × to revoke early and a tooltip naming who granted it and exactly when it expires. When the source is inherited (an org-wide legacy toggle, or a group grant) the row names that source instead of offering a personal switch, because the fix belongs at the source: the Models page for an org-wide toggle, Access Groups for a group grant. A user can also request Complex from their own side; a pending request shows a small requested badge on their row until an admin grants or declines it from here or from the queue on the Models page.
Finding people
The list supports free-text search, a role filter, an instance filter (Build seats versus Chat seats), and sortable columns for email, role, instance, and status.
Groups and departments
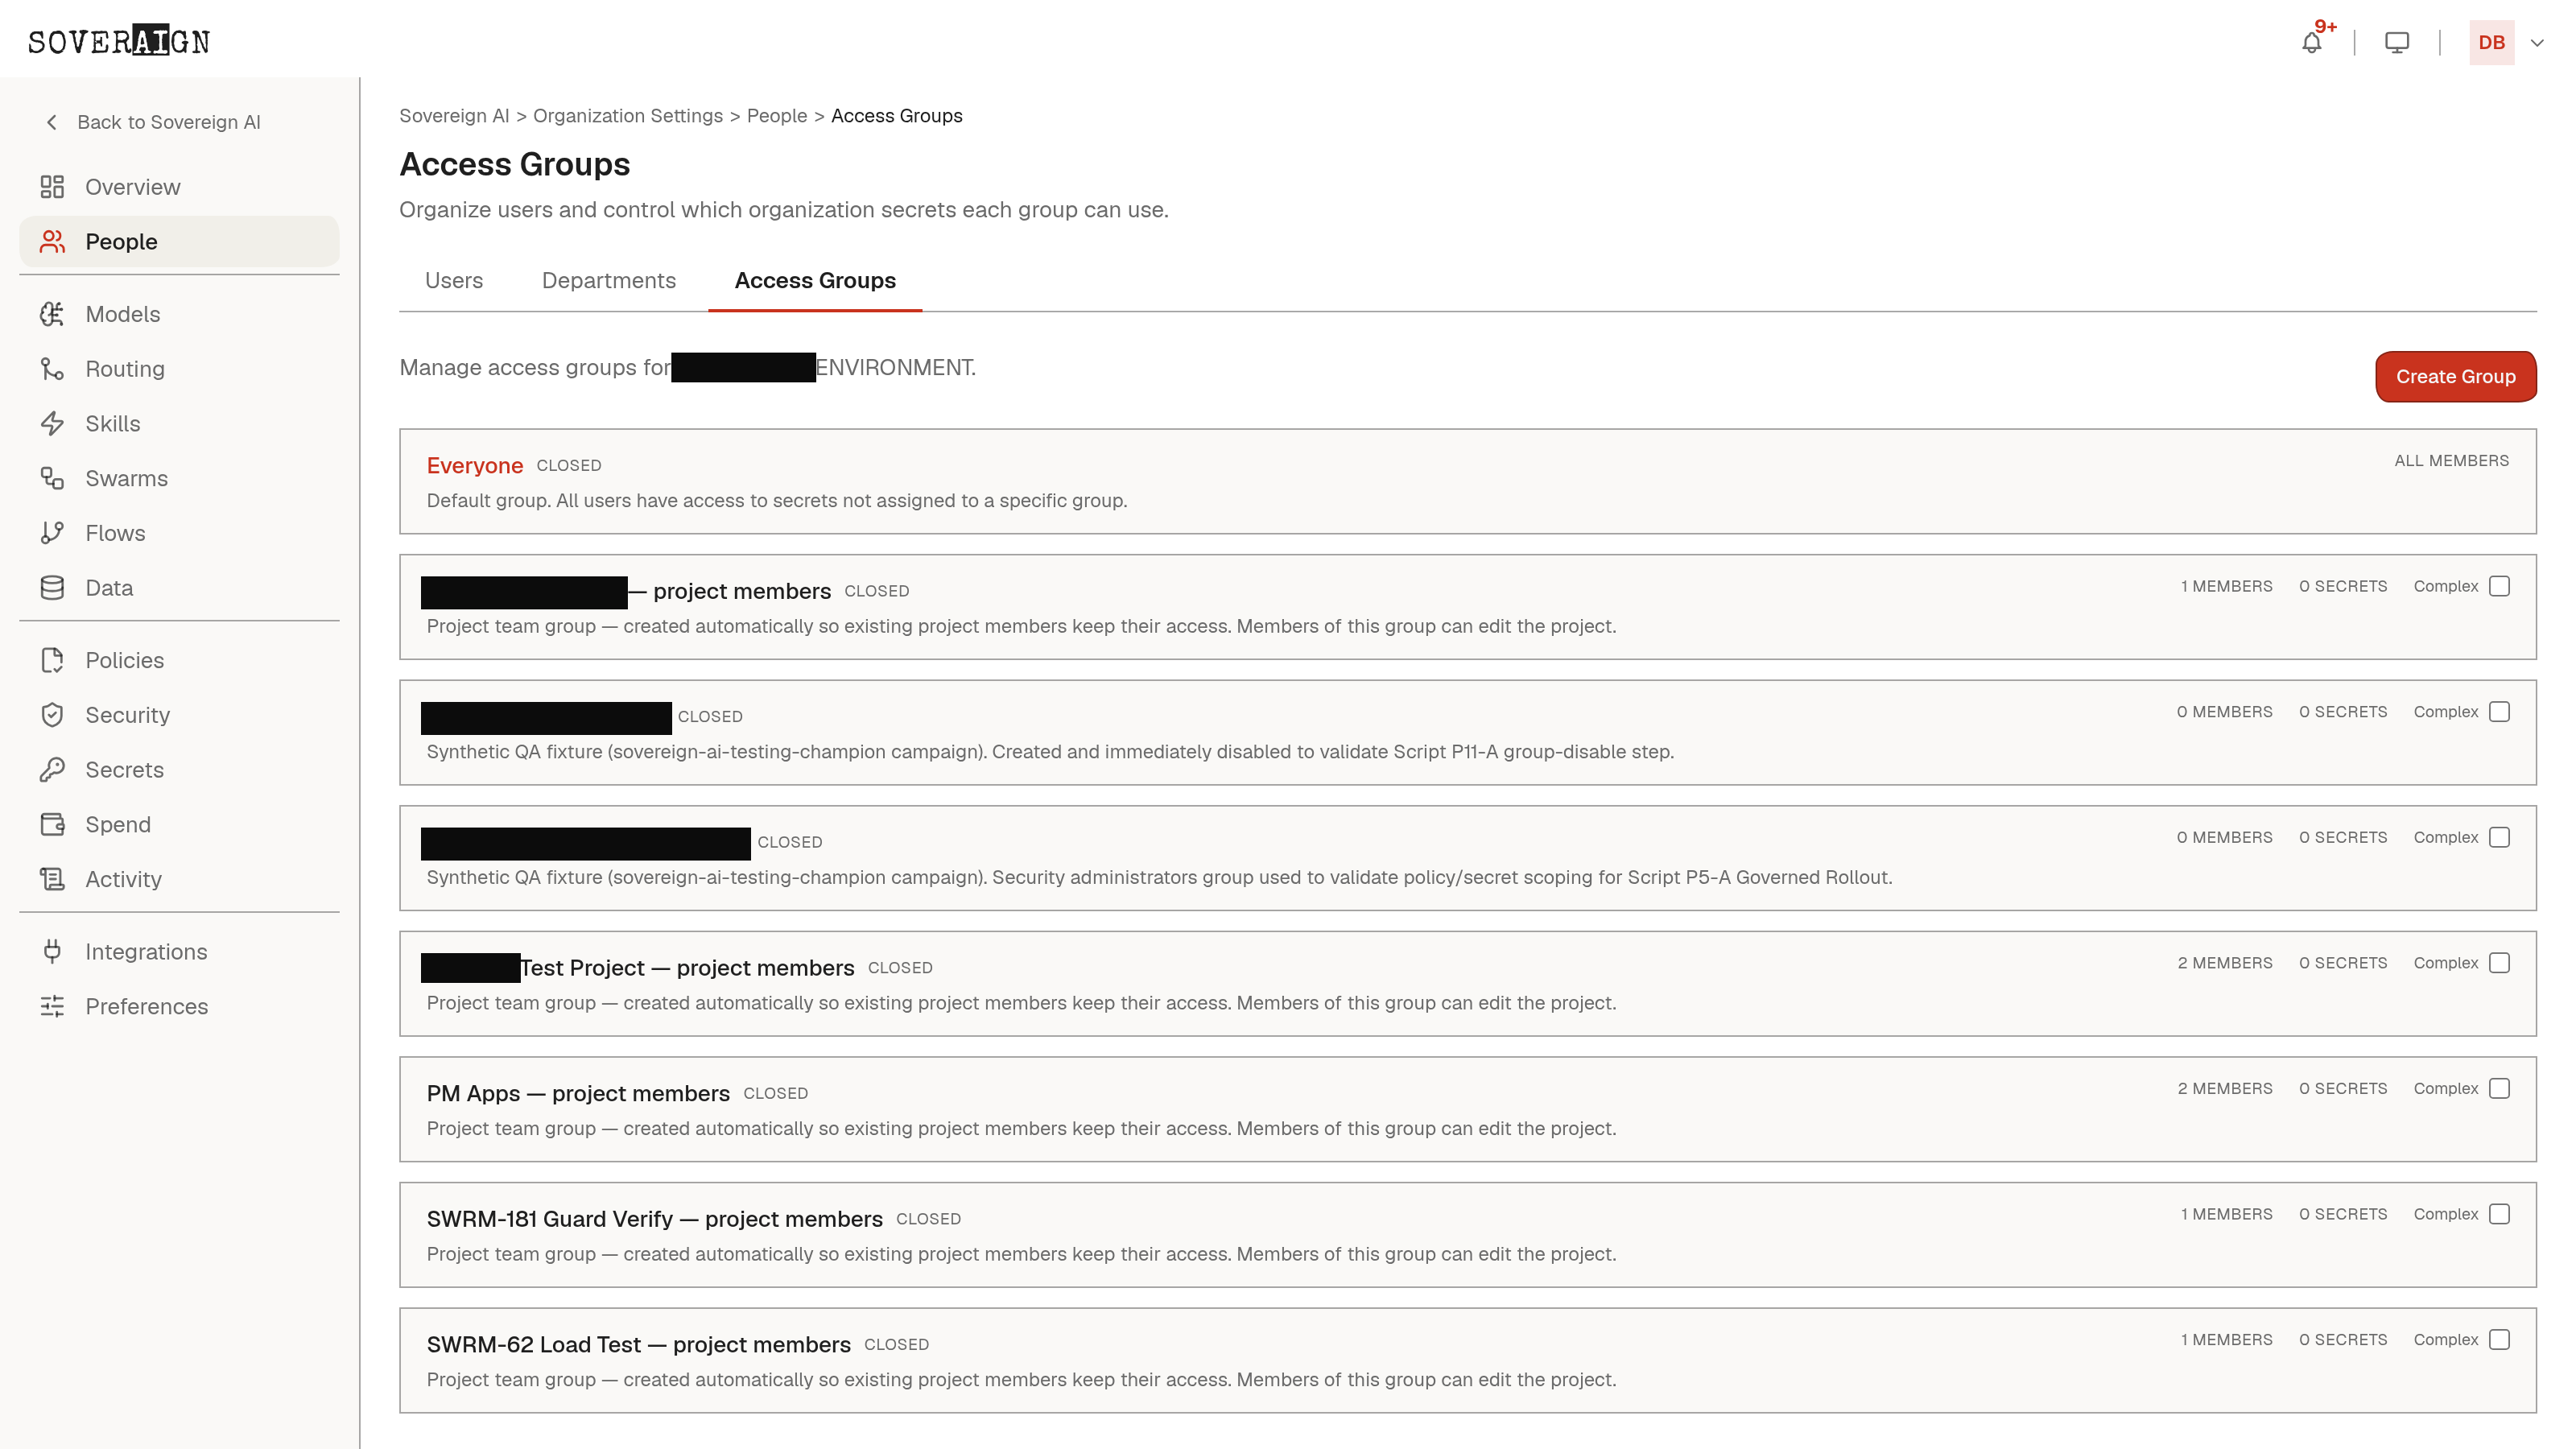
Assign members to access groups directly from their row in the user list. Access groups gate resources: for example, an MCP connection scoped to a group is only usable by that group's members. Groups themselves are created on Organization Settings > Access Groups with a name and description, and members are added there or from the Users page.
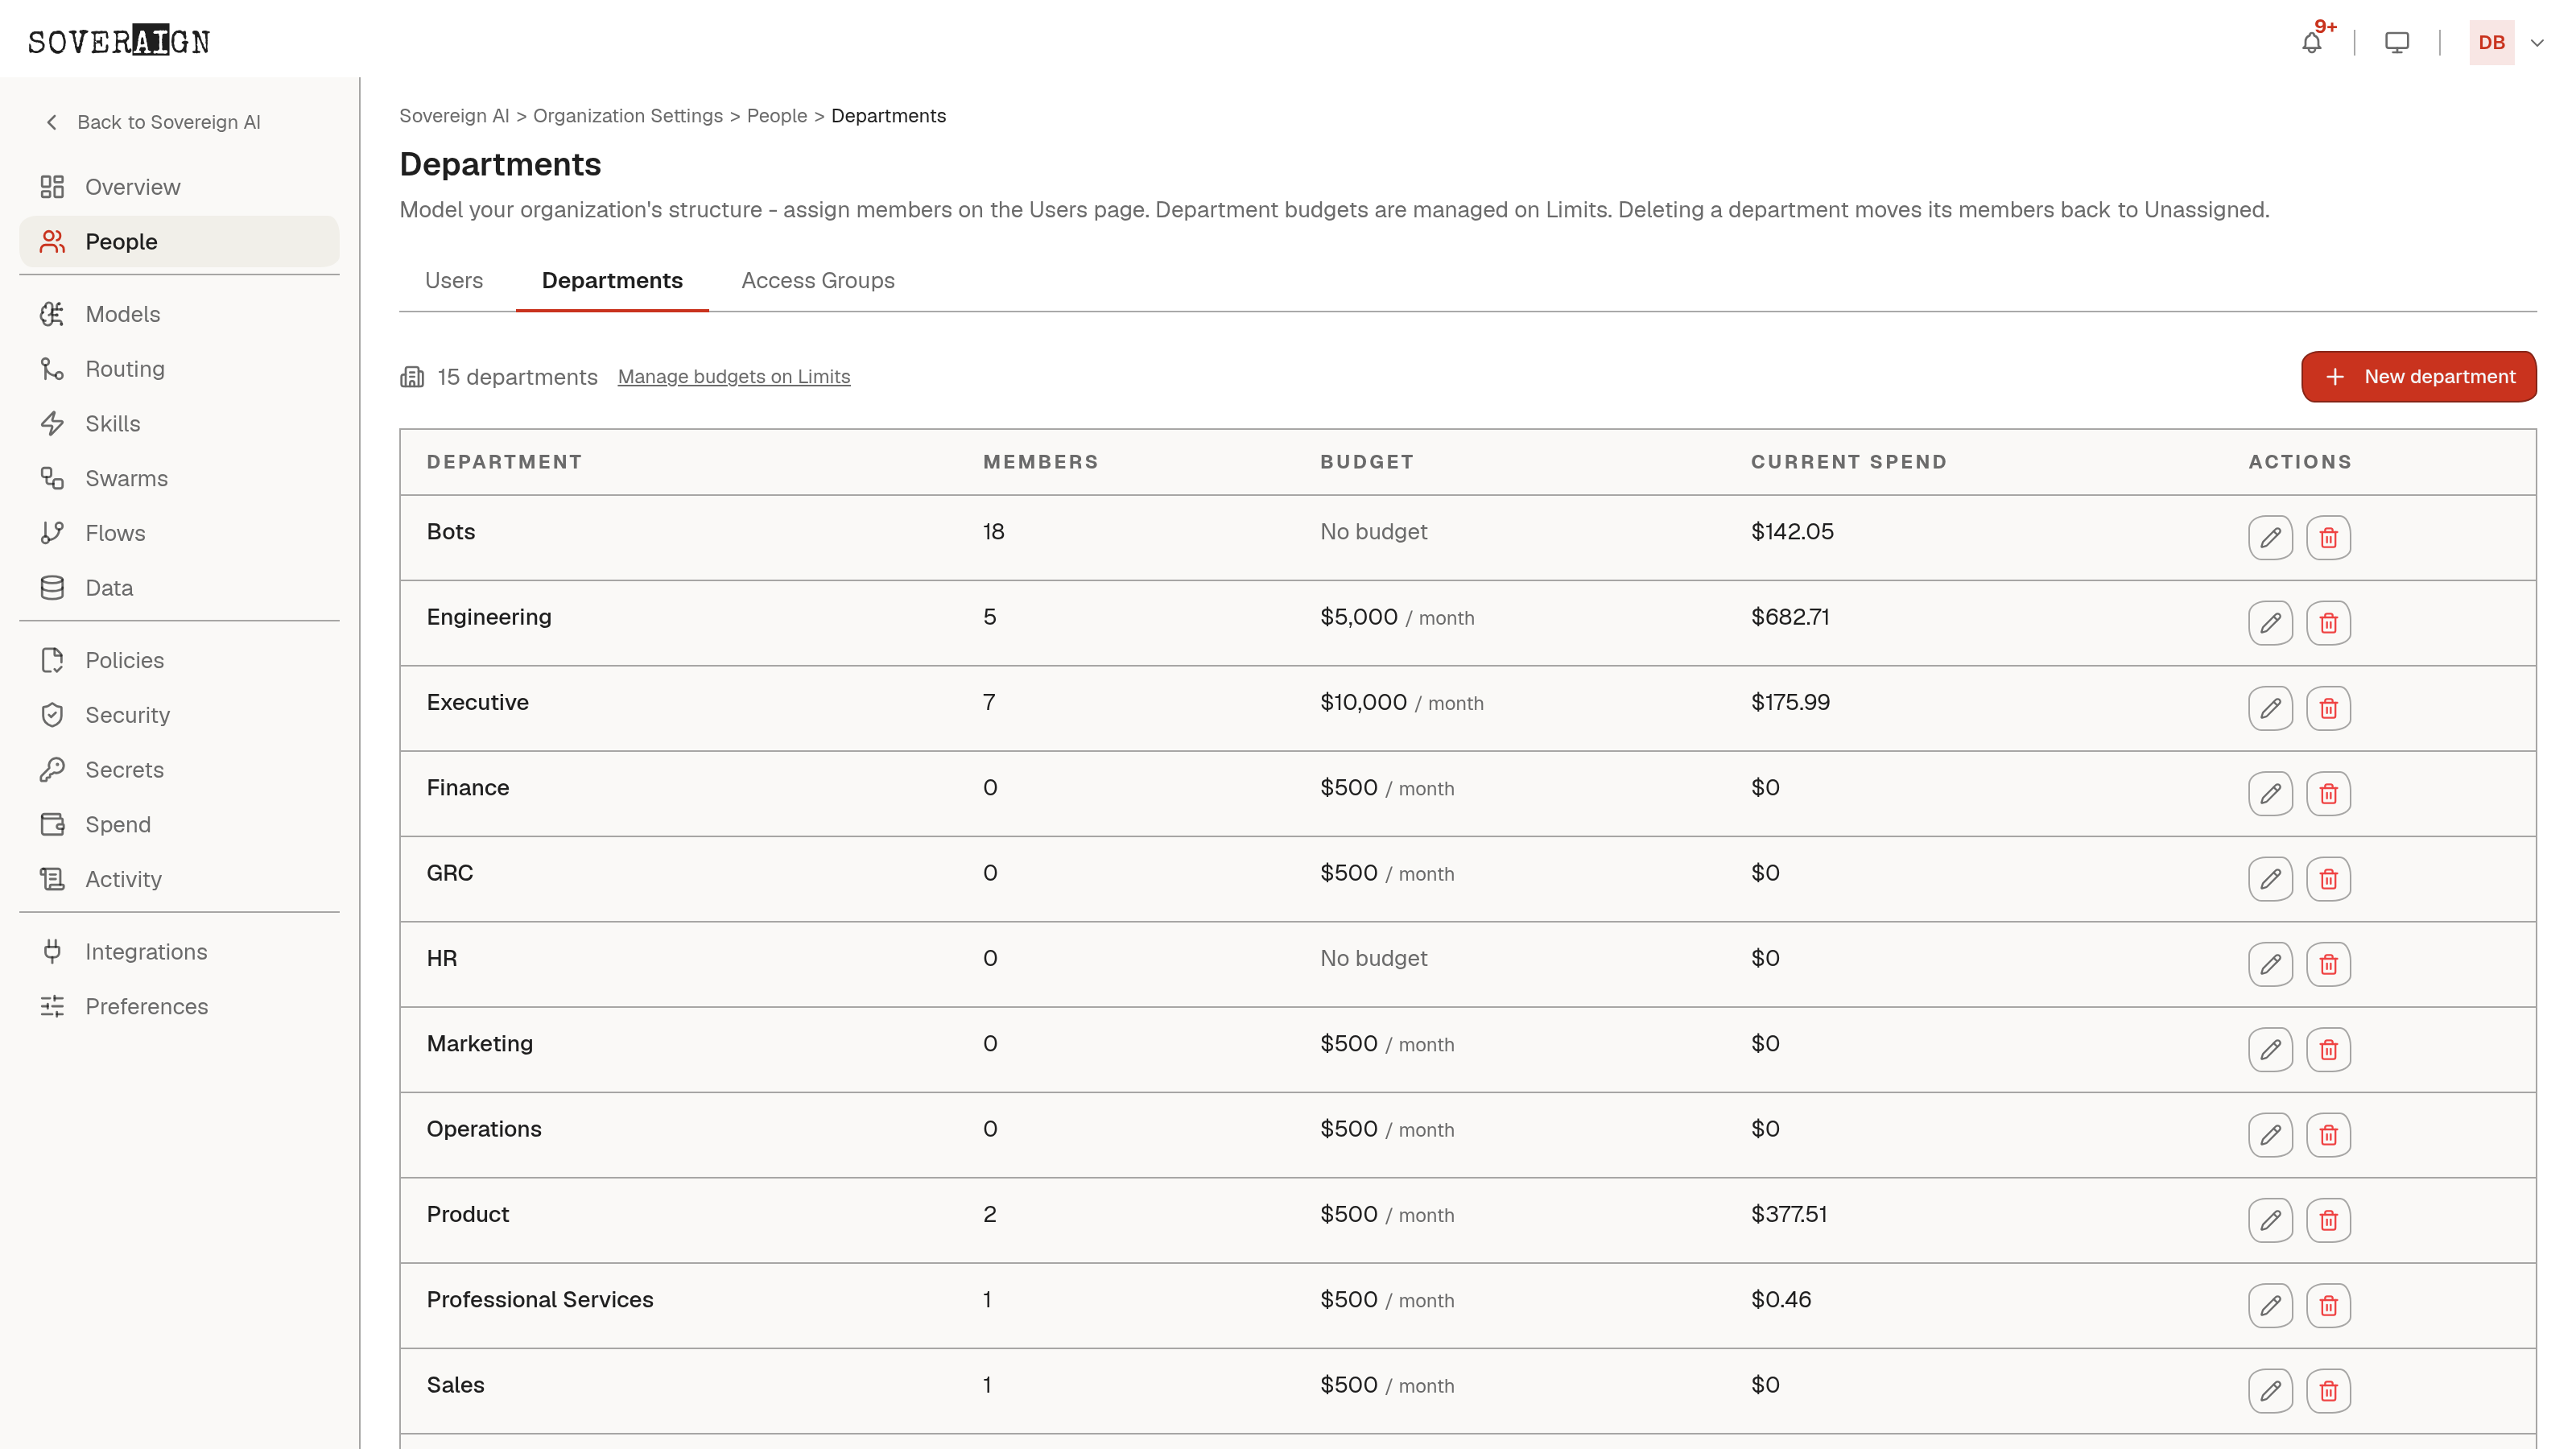
Each member also belongs to at most one department. Departments are pure org structure, created on Organization Settings > Departments; per-department budgets are set on Spending Limits, the single authoritative home for financial controls. Deleting a department flips its members back to Unassigned, so nobody is stranded.
Single Sign-On
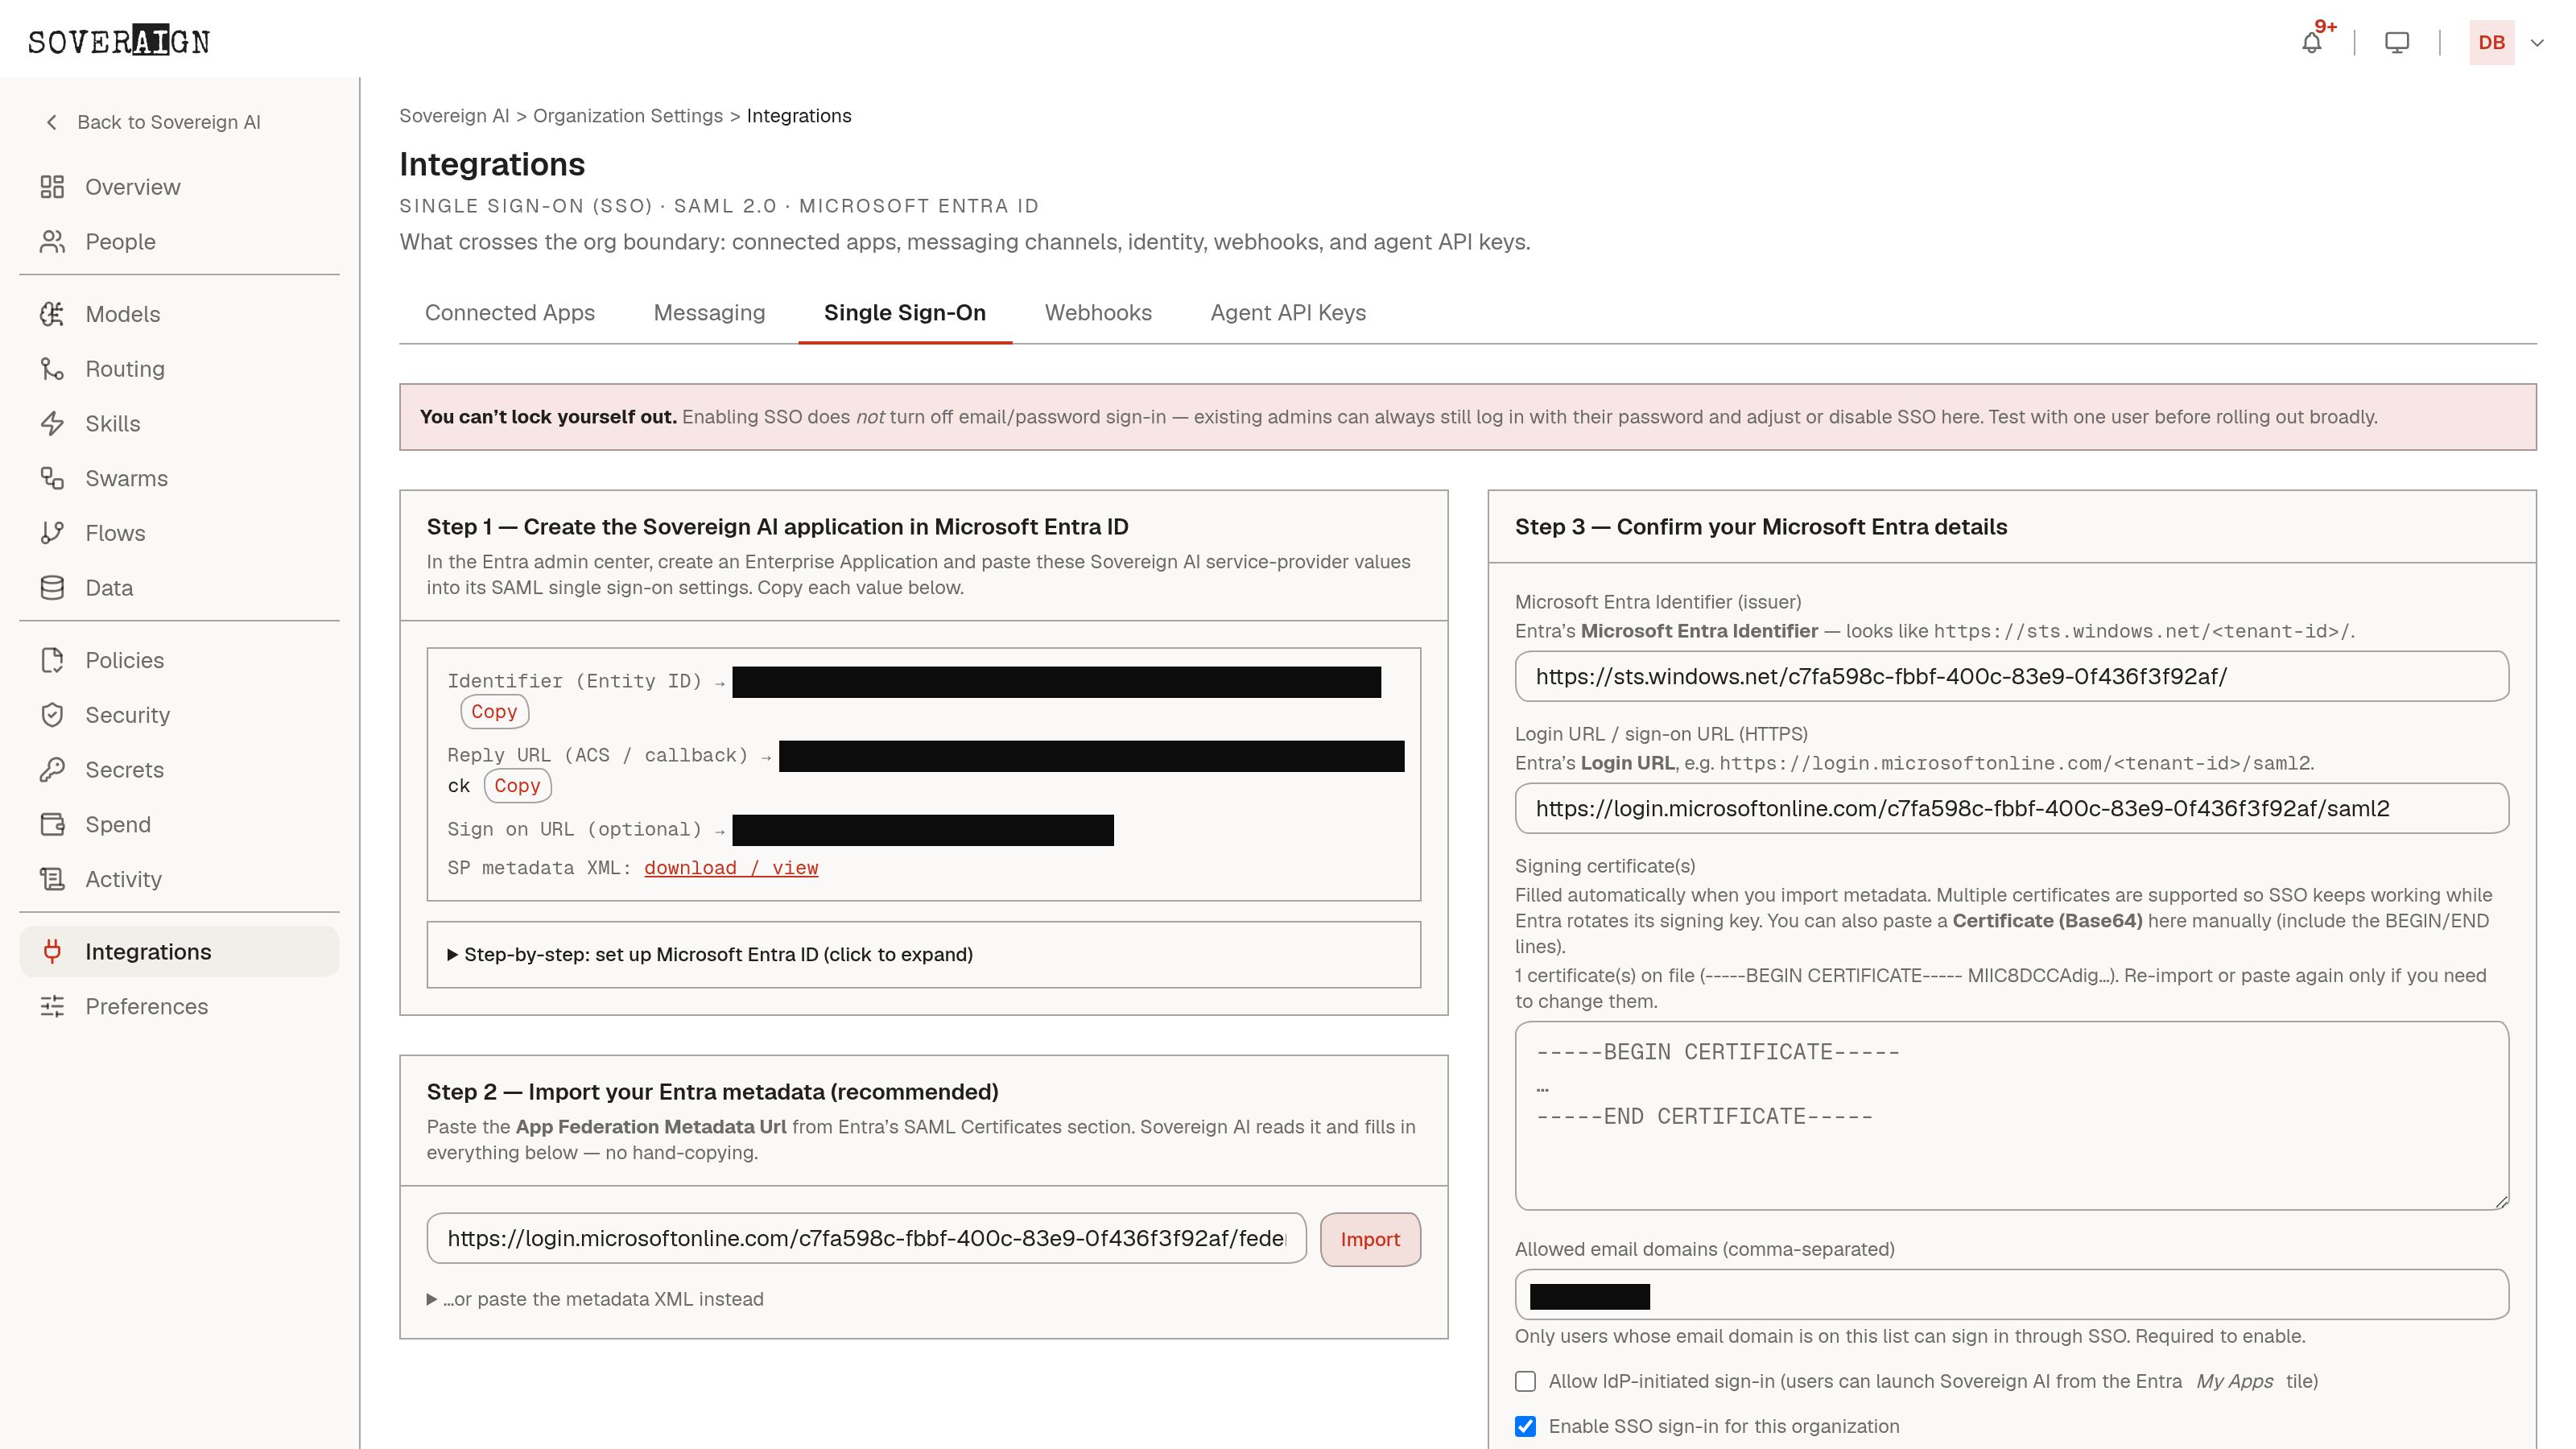
Organization Settings > Single Sign-On configures SAML 2.0 with Microsoft Entra ID. Paste your Entra federation metadata URL or the metadata XML and the form auto-fills the identifier, sign-on URL, and signing certificates; the SP values you need on the Entra side are shown with copy buttons. You must add at least one allowed email domain before enabling SSO, and the signing certificate never round-trips back out of the API after you save it. Access is controlled at the identity provider, so revoking someone in Entra cuts their platform access immediately, without a separate deprovisioning step someone has to remember.
Export
Export the roster as CSV (email, name, role, seat plan, member since) for license and finance reconciliation. The export matches exactly what the table shows.